Spreadsheet Instructions for Grocery Shopping
So you’ve decided you want to limit your time in the grocery store? Well good for you! After all, you have better things to do with your time, right?
It doesn’t matter if you have little spare time in your life or you’re retired and can go to the store every day. No one wants to waste their time on tasks like grocery shopping.
And if you love this idea, be sure to sign up to receive my newsletter where you’ll hear about all kinds of useful ideas just like this one!
How This Simple Spreadsheet Tool Can Work for You
By investing just a little bit of time into customizing this template for your own life and family, you will save so much in the long run.
These instructions can be used along with the downloadable file to help you set up your own grocery shopping process.
Go ahead, open the file, read through the instructions below and give it a try!
- Download the file Grocery_template
- Follow these instructions
Ok, Let’s Get Started
Plan of attack:
1st – Set up your FILES
2nd – BUILD your Master List
3rd – ALIGN your Master List with Your Grocery Store
4th – Learn to USE your Master List
1st — Set up Your FILES
Here’s one good way to keep your files in order
- Download my file
- Save it just the way it is in a special folder and call it ‘grocery_template’
- Save it again as ‘grocery_master’
By doing these steps at the beginning, you have the template in a safe place. That way if you ever accidentally override something in the formats etc, you can always just go back to this original file. You could download it again from the website. But by keeping a clean template file, you avoid that step if you ever need it.
The ‘grocery_master’ will be your main file. This is the one you will be using to put in all your particular items. You can just stop there and use the ‘grocery_master’ as your usable worksheet each time you plan a trip to the store.
Or, if you want to be super cautious, then keep that ‘grocery_master’ also in a safe place after you’ve added all your items in the first four columns (which we discuss below). And each time you plan a trip to the store, make copy of ‘grocery_master’ to be your ‘grocery_shopping’ list. Whichever one you decide to use can be re-used for every store visit.
That may seem like a lot of file saving up front. But you may be better off in the long run. If anything gets messed up along the way, you won’t have to start all the way from scratch.
2nd — BUILD Your Master List
This section populates Columns A, B, and C
Refer back to Steps 1 and 2 in the Original Post for the context behind these details.
This is where you start recording what you use throughout the day.
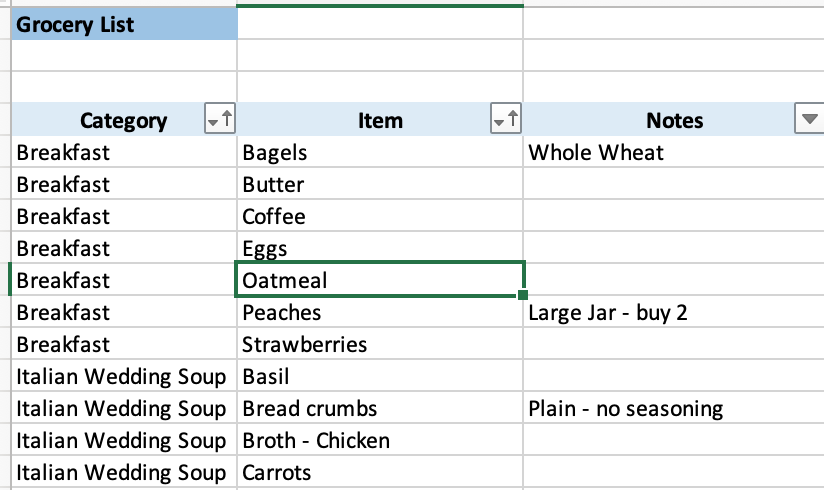
Start with the every-day items, and begin populating Columns A, B, and C
Column A (‘Category’) – Note breakfast, lunch, snacks, etc
Column B (‘Item’) —Record the grocery item itself
Column C (‘Notes’) – Add any special notes such as brand or quantity
While the main purpose of this step is to record the item itself in Column B, Columns A and C will come in handy later when you are preparing for each trip to the store.
Next, Plan out dinners
You are still using Columns A, B and C for this part of the exercise.
Column A (‘Category’) – record the name of the meal e.g. Italian Wedding Soup.
Column B (‘Item’) – record the name of each item that meal uses
Column C (‘Notes) – again, this is for whatever helps you, such as quantity or brand
Note: Column C can come in very helpful if someone else is doing the shopping.
3rd – ALIGN Your List With Your Grocery Store Layout
Column D is set up to record the section of the store where you will find the item
You have three options for Column D:
- Just type in the name of the area of your store, e.g. ‘product’ or ‘meat’ or whatever makes sense to you
- Use the drop down list that I created. Click on a box in Column D and you will see an arrow. Click on the down arrow and select from one of my pre-populated names
- Customize your own list of areas of the store. This way your areas appear in the drop down selection when you click on that arrow in a box in Column D. See below for how to customize your own drop down list.
Use this section to customize the store layout out choices to match the way your own store is set up.
How to customize the drop down list for areas of the store
- The second tab of the spreadsheet (see ‘Layout’ at the bottom of the spreadsheet) contains the list of store sections or departments. You will see the list I pre-populated. But you may want to customize this list to fit your own grocery store sections and layout.
- So in that second tab (the ‘Layout’ tab), type in column B each section of your grocery store – the way you use it. Just override what I have there with your own layout areas.
- I would suggest keeping the format here with a number first (for example, 1_Produce, 2_Meat etc.) That way, when you sort the list (explained in a later step), the order will be maintained the way you set it up.
- I have the drop down list ready to track 15 sections of the store. I don’t think you need more than that. Remember that this is just about navigating your way up and down aisles. Fifteen sections of the store should be plenty for doing that.
- So start by thinking through the order you usually follow when you walk through the store. Then record each section in that Column B on the ‘Layout’ Tab.
Now Back to the ‘GroceryList’ tab
After each item in your list, choose the area of the store from Column D. The dropdown choices for Column D should now be populated with the sections of the store as you listed them in the step above.
Save this as your ‘grocery_master’ file. I would suggest saving it along the way too as you are populating these columns. This is just an extra safety measure.
4th – Learn How to USE Your List
So at this point you now have a fully populated Comprehensive List with all the items you normally use and where to find them in the store. Theoretically, you shouldn’t have to repeat any of the steps up to this point. But of course, if you think of more items, you can always add them to your comprehensive list. This list is now a super valuable tool you will be so glad you have!
Next come the steps you follow each time you plan to make a trip to the store
The Steps from this Point Forward are Your ‘REPEATABLE STEPS’
SORT by the Layout area
- Highlight the whole area from the Headings (row 4) on down to the bottom of the list. So if your list is 100 items long, your section would be A4 to E104, for example.
- Click on ‘Data’ and then ‘Sort’
- A box shows up. Click on the box at the top right that says ‘my list has headers’. Note: Make sure your highlighted area includes the header row.
- Look for the words ‘sort by’ and to the right of that, right under the word ‘column’ click on the arrows and select ‘Where?’
- Click on ‘ok’
Sorting the list by the store layout will also help with this next step – deciding what you need.
The last column ‘Need It?’ is where you note the items you plan to purchase in this trip.
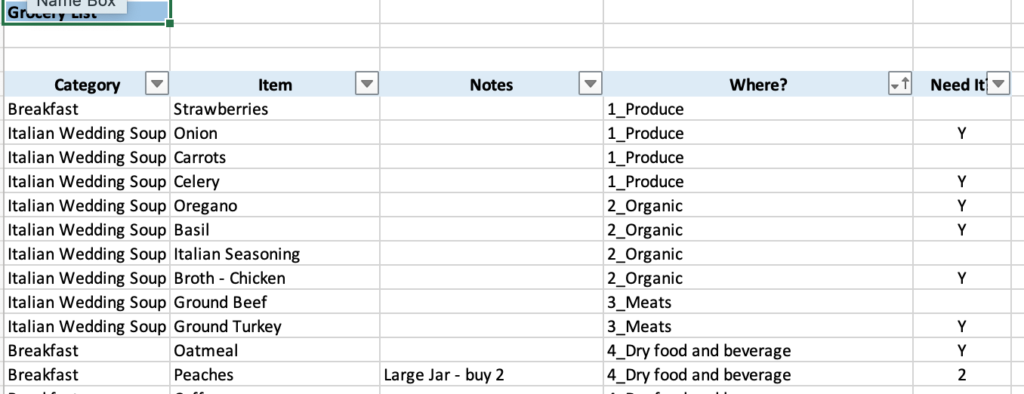
SELECT What you need: Now you can read down the list and start to put a notation in the ‘Need it?’ column. Any marking will do. Simply just place a ‘Y’ for ‘yes’. Or you can place a number here for the quantity.
To simplify your list, you need now to only look at the items you decided you need to buy. The FILTER feature in Excel will help you accomplish this.
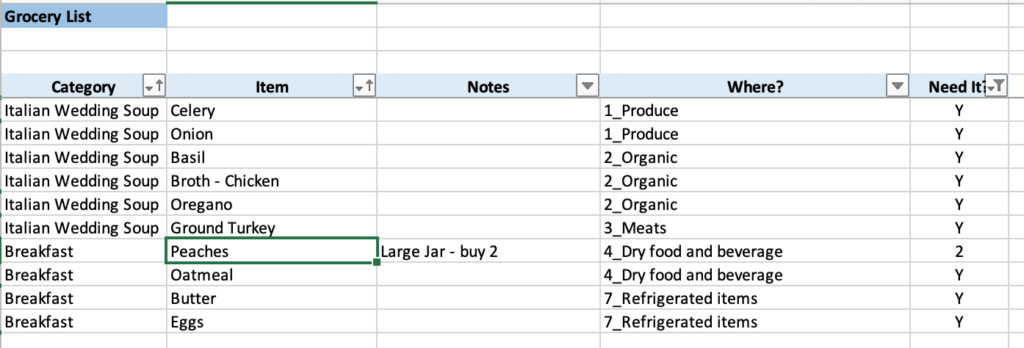
FILTER the ‘Need It?’ column: Click on the arrow in the ‘Need It?’ box and unselect the ‘blanks’. Or saying the same thing the other way, uncheck every box and then check all the boxes other than the ‘blank’ box.
FINAL PRODUCT: Now you have a full list of everything you need sorted by the way your grocery store flows.
Be sure to SAVE THIS FILE!
You are NOW Ready to Hit the Grocery Store Armed with Your Super Organized List!
Note for Ongoing Use: You’ve made your first trip to the store. Good for you! Now every time you plan a trip to the store, start with your ‘grocery_master’ for a clean start.
Download Your File: Grocery_template
Hello!
I truly hope you enjoyed this little exercise.
I know it takes an investment of time. But it is well worth it in the long run! Once you’ve gone through the process a time or two, it will feel like second nature.
Have fun and do something special with your new found extra time!

And don’t forget to sign up for my newsletter where you’ll hear about all kinds of new ideas.


